
 Basin for Craft docs
Creating and editing forms
Users with the right permissions can create forms in your linked Basin project, change their everyday settings and delete them, all from the Control Panel. Nobody needs a Basin login for this. That’s useful when, for example, an agency owns the Basin account and the client adds their own forms.
Changes go straight to Basin. They aren’t saved in project config, so they can be made on your live site. Each environment changes the Basin project it’s linked to, so a form created on staging (linked to a staging project) isn’t on production.
Creating a form
Section titled “Creating a form”- Go to Basin → Forms and click New form.
- Give it a Name. Only you and Basin see it, not visitors.
- Enter the Notification email: who Basin emails when someone submits the form. Separate addresses with commas.
- Click Save.
The form is created in your linked project, using your site’s timezone. Its settings open next, so you can change anything else.
If you leave the Notification email blank, notifications go to the Basin account owner, and the form’s settings say so once it’s created.
To put the new form on your site, use your own markup or let editors pick it in a Basin Form field.
Verifying notification addresses
Section titled “Verifying notification addresses”Basin emails each new notification address, asking it to verify. Until an address is verified, it doesn’t receive notifications. Addresses already verified on another of your Basin forms, in any project, don’t need verifying again, and nor does the Basin account owner’s.
In a form’s settings, Send to, CC and BCC list their addresses as chips. Type an address and press Enter to add one, and click its × to remove it. Verified addresses are outlined in green with a tick, and addresses waiting for verification in orange with a clock. If none of a form’s Send to addresses are verified yet, the form doesn’t email anyone, and the field warns you.
Adding an address to Send to asks you to confirm before saving, since the new address won’t get notifications until it’s verified. If Send to was empty (so the Basin account owner was getting them), or you’ve replaced every verified address in it, the form won’t email anyone until a new address is verified.
Changing a form’s settings
Section titled “Changing a form’s settings”Open the form under Basin → Forms and click Edit settings.
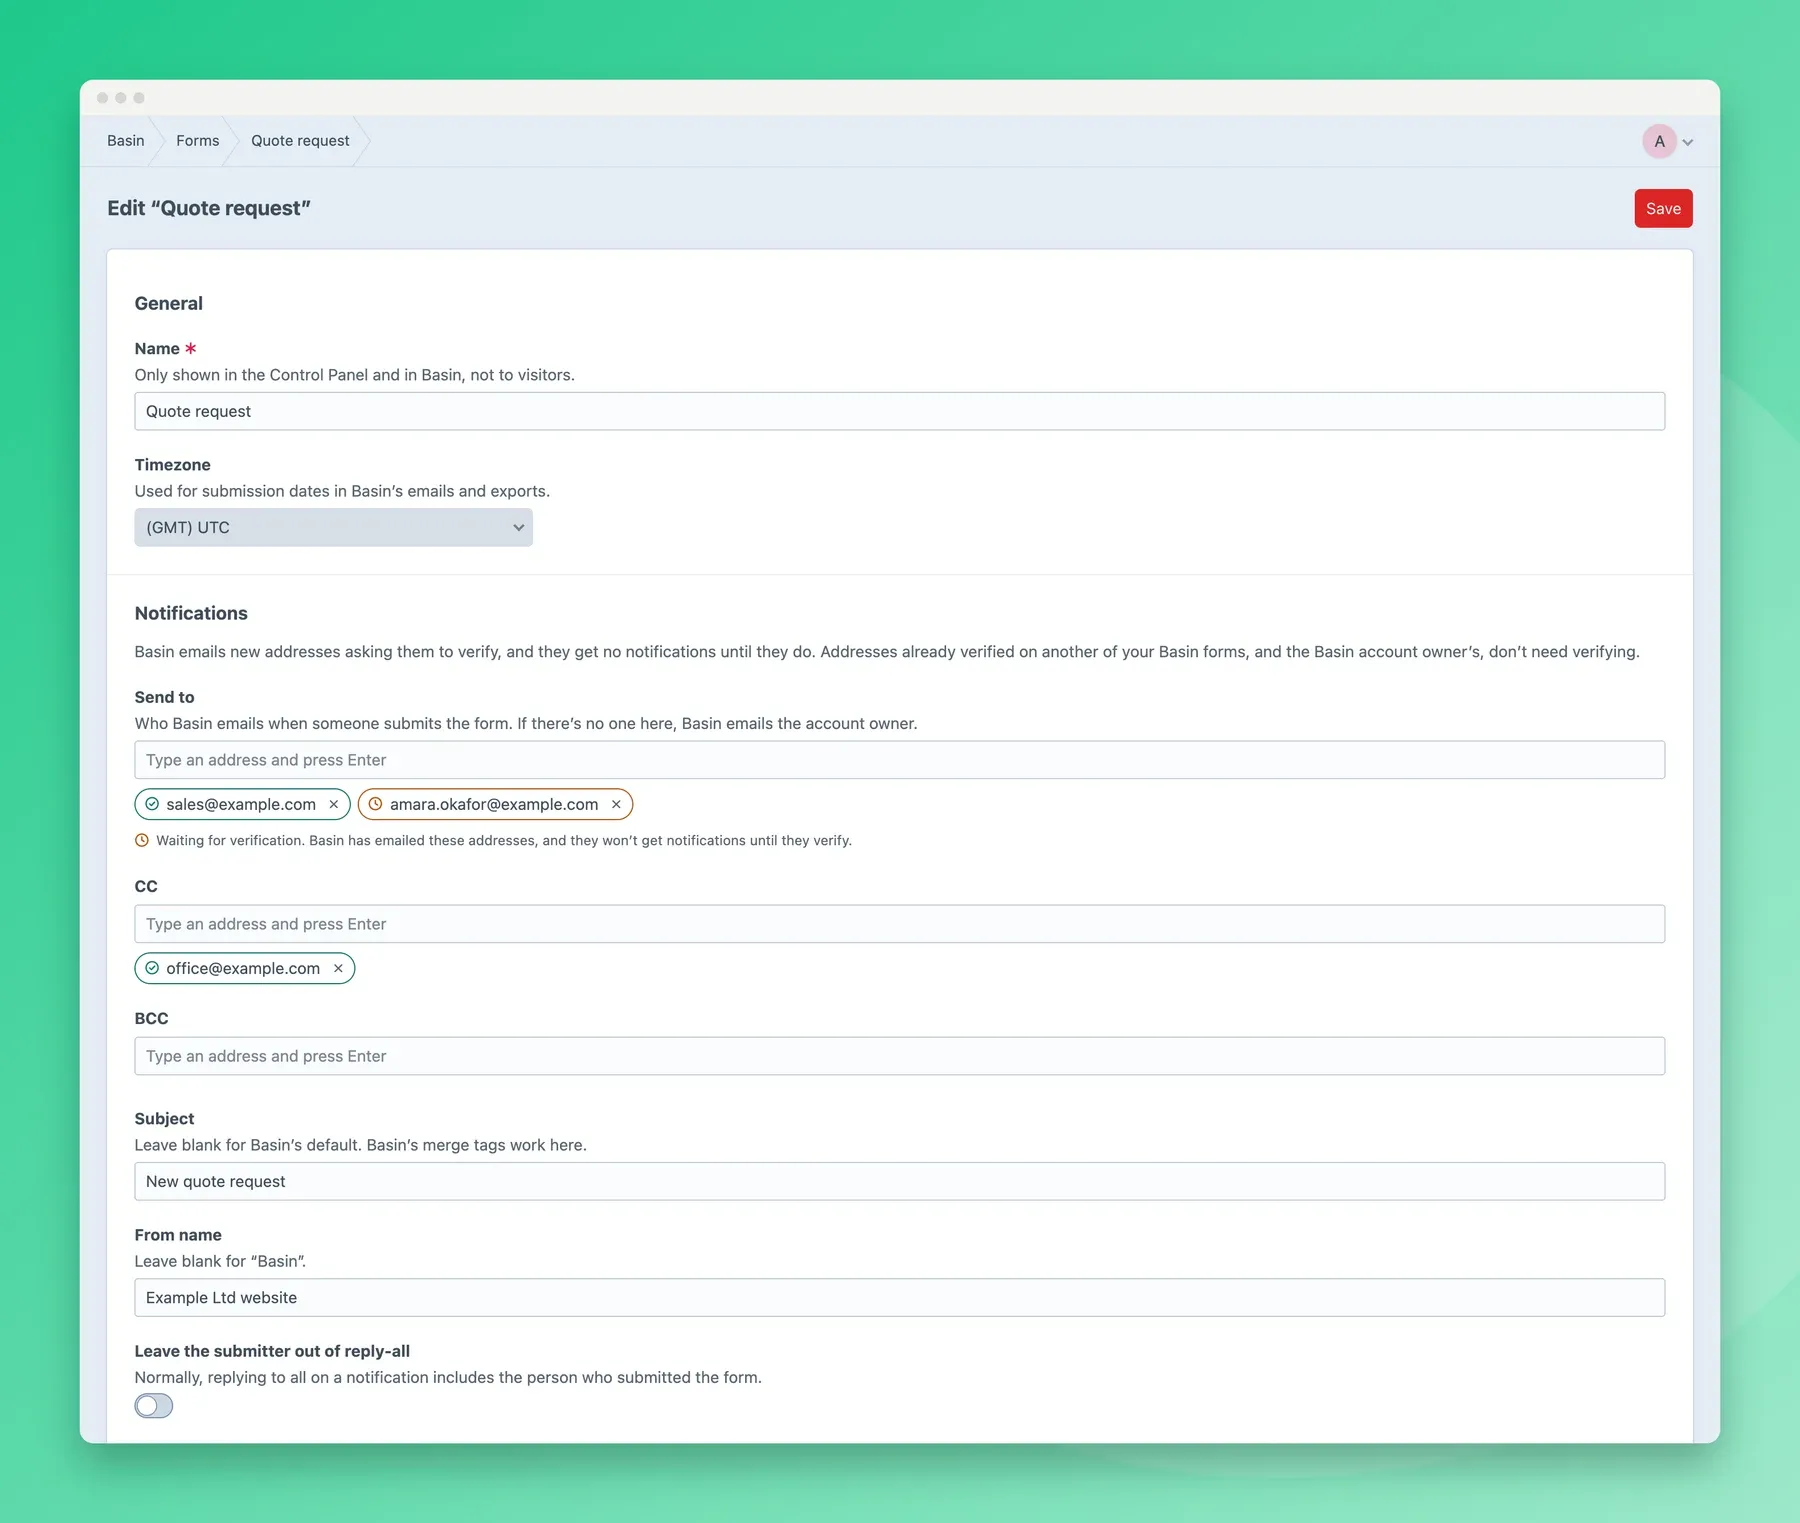
| Section | Settings |
|---|---|
| General | Name, timezone |
| Notifications | Send to, CC and BCC addresses; subject; from name; whether replying to all includes the person who submitted the form |
| After submitting | Redirect URL, or the heading, message, button text and button colours of Basin’s thank-you page; Always respond with JSON (Basin’s Enable AJAX) |
| Auto-reply | Whether to email the person who submitted the form, and the email’s subject, from name, reply-to address, greeting, message and signature |
| Data | How many days Basin keeps submissions, from 1 to 3,650 |
Only the settings you change are sent to Basin. If Basin rejects a value, its message is shown on the field.
Auto-replies go to the address in the submission’s email or email_address field, so the form needs one of those.
What’s still changed in Basin
Section titled “What’s still changed in Basin”Some settings are only changed in Basin. Each form’s settings show them, with a Change in Basin link:
- Spam protection: CAPTCHAs and Turnstile keys, the honeypot field name, allowed and blocked domains, the content blacklist, email and phone validation, and country, language, IP and browser blocking. Basin’s API can’t change all of these, so they’re kept together in Basin.
- Webhooks.
- Email design: mail templates, sending domains, and how attachments are sent.
The plugin picks up changes made in Basin within the Cache duration.
Deleting a form
Section titled “Deleting a form”Deleting needs the Delete forms from Basin permission. At the bottom of a form’s settings, click Delete form…, then type the form’s name in the dialog. The Delete form button works once the name matches exactly.
The plugin’s own settings for the form (its Form Studio embed code and reCAPTCHA version) are removed too. Templates and fields that still use the form show up in the error log.